The Ultimate Guide to Pressure Washing Decks: Tips, Techniques, and Best Practices
A well-maintained deck can be the centerpiece of your backyard oasis, offering a perfect spot for summer barbecues, evening relaxation, or family gatherings. But over time, exposure to the elements can leave your deck looking weathered, stained, and even unsafe. That’s where pressure washing comes in.
Pressure washing is one of the most effective and efficient ways to restore the beauty and integrity of your deck. Done properly, it can remove years of built-up dirt, mold, mildew, algae, and even old finishes. But if done incorrectly, it can easily damage your deck’s surface and lead to costly repairs.
In this blog post, we’ll dive into everything you need to know about deck cleaning—from preparation to execution and aftercare. Whether you’re a DIY enthusiast or considering hiring a pro, this guide will ensure your deck gets the refresh it deserves.
Why Pressure Washing Your Deck Is Important
1. Improves Appearance
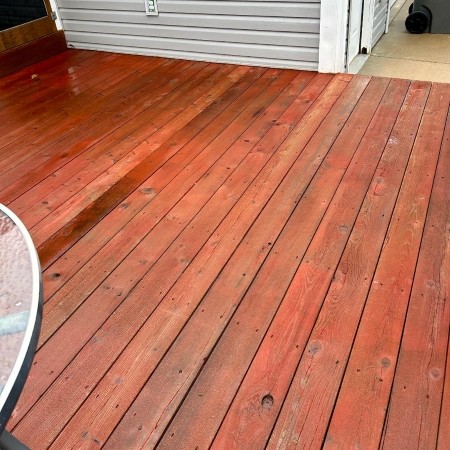
A clean deck just looks better. Pressure washing strips away discoloration, stains, and grime, instantly reviving your outdoor space and making it more enjoyable to use.
2. Extends Lifespan
Mold, mildew, and algae can eat away at the wood over time, causing premature decay. Regular cleaning helps prevent this damage, keeping your deck stronger for longer.
3. Prepares Surface for Sealing or Staining
If you plan to reseal or stain your deck, pressure washing is a crucial first step. It opens up the wood grain and ensures that the new finish adheres properly, improving both performance and longevity.
Tools and Equipment You’ll Need
Before you start, gather the right tools. Here’s what you’ll need:
- Pressure Washer: Ideally one with 1,500–2,500 PSI for wood decks. Gas models are more powerful, but electric models are easier for beginners to handle.
- Wide-Angle Nozzle: Use a 25° or 40° tip to avoid damaging the wood.
- Deck Cleaner or Detergent: Specifically formulated for wood or composite decks.
- Broom or Brush: For sweeping off debris.
- Protective Gear: Gloves, goggles, and non-slip shoes.
- Plastic Sheeting: To cover nearby plants or structures.
Step-by-Step: How to Pressure Wash a Deck
Step 1: Prepare the Area
Start by removing all furniture, planters, and décor from the deck. Sweep off leaves, dirt, and any loose debris. Cover nearby plants, siding, and light fixtures with plastic sheeting to protect them from water and detergent overspray.
Inspect the deck for damaged boards, popped nails, or splinters. Make repairs now—pressure washing can worsen existing damage.
Step 2: Apply Deck Cleaner
While you can pressure wash with water alone, using a deck cleaner will break down grime more effectively. Mix and apply the cleaner according to the manufacturer’s instructions. You can use a garden sprayer or the detergent injector on your pressure washer if available.
Let the cleaner sit for 10–15 minutes, but don’t let it dry. If necessary, mist it with water to keep it wet during dwell time.
Step 3: Start Pressure Washing
Attach the 25° or 40° nozzle to your pressure washer. Begin with the lowest pressure setting and test it on a small, inconspicuous area. Stand about 12–18 inches from the deck surface, and use long, even strokes with the grain of the wood.
Avoid staying in one spot too long—this can gouge the wood. Move the spray wand steadily and overlap each pass slightly for an even clean.
Step 4: Rinse Thoroughly
After cleaning, go over the deck with plain water to rinse away any remaining detergent or debris. Make sure to flush out cracks, joints, and corners where residue may linger.
Common Mistakes to Avoid
1. Using Too Much Pressure
More power doesn’t always mean better results. High pressure can damage softwood and cause splintering. Always start low and increase only if needed.
2. Holding the Nozzle Too Close
Keeping the nozzle too close can leave streaks or etch marks. Maintain a consistent distance of at least 12 inches.
3. Using the Wrong Detergent
Household cleaners or bleach can damage your deck and surrounding vegetation. Use a product specifically designed for decks.
4. Skipping Repairs
Cleaning won’t fix broken boards or rotting wood. Pressure washing a damaged deck can make things worse.
Aftercare: What to Do After Pressure Washing
Once your deck is clean, let it dry completely—this typically takes 24–48 hours depending on the weather. After it’s dry, it’s the perfect time to stain, seal, or paint the deck.
Sealing and Staining
Sealing protects the wood from moisture, UV rays, and mildew, while staining enhances its color and grain. Choose a quality sealant or stain based on your deck’s material and your desired look. Apply with a brush, roller, or sprayer, and follow the manufacturer’s instructions for drying and curing times.
Regular Maintenance
Keep your deck in good shape by sweeping regularly, cleaning spills promptly, and giving it a light wash at least once a year. Periodic re-sealing or staining—typically every 2–3 years—will keep it looking great and structurally sound.
Should You Hire a Professional?
While pressure washing can be a DIY task, it’s not without risk. If you’re unsure about using a pressure washer or your deck has intricate details, a pro might be the better option. Professional services typically include inspection, cleaning, and post-wash recommendations—and their experience minimizes the risk of damage.
Pros of Hiring Out:
- Expert technique and equipment
- Time-saving
- Reduced risk of damage
- Better results for older or more delicate decks
Pressure Washing Composite Decks vs. Wood Decks
Not all decks are created equal. While wood decks are most common, composite decks are becoming more popular due to their low maintenance.
Wood Decks
- Use lower pressure (1,500–2,000 PSI)
- Clean with a wood-specific detergent
- May require resealing or staining
Composite Decks
- Use even lower pressure (1,300–1,500 PSI)
- Avoid harsh chemicals or brushes
- No need to seal, but cleaning improves appearance
Always check the manufacturer’s guidelines for your specific decking material.
Eco-Friendly Pressure Washing Tips
Concerned about environmental impact? Here are some tips to reduce your footprint:
- Use biodegradable, non-toxic cleaners.
- Avoid washing into storm drains—block runoff with sandbags or direct it to landscaped areas.
- Clean during dry weather to prevent wash-off into nearby waterways.
- Consider using a water broom attachment to reduce water use.
Final Thoughts
Pressure washing your deck can feel like a big job, but the payoff is worth it. With the right tools, techniques, and timing, you can breathe new life into your outdoor space, making it safer, more beautiful, and longer-lasting. Whether you’re prepping for a backyard party or just giving your home some seasonal TLC, pressure washing your Wentzville area decks is one of the smartest maintenance moves you can make.
Just remember: start slow, follow best practices, and when in doubt, call in a pro. Your deck—and your guests—will thank you.
Schedule Your Pressure Washing Service Now!Contact Hydro Doctor Pressure Washing In Wentzville & Surrounding Areas!